Pages

Sunday, June 28, 2015

Lovin the New In-Colors!


The new Stampin' Up catalog is here!  It has some fabulous new products, and I love the new in-colors!  I will be sharing some 3x3 cards I created using the new in colors.  


To create these cards, I used Whisper White and the new In-Colors:
Watermelon Wonder
Cucumber Crush
Delightful Dijon
Mint Macaron
Tip Top Taupe

I also mixed and matched two different stamp sets among the different cards to create different looks on the cards using the same stamps:
Flower Patch (#134207) 
Work of Art (W#134111, C#134114)

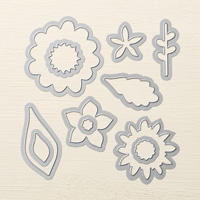
Don't forget the coordinating framelits, Flower Fair Framelits (#133731), to go with the Flower Patch stamps.  I also used the Bitty Banners Framelits (#129267) to cut out the phrase on top of the flowers on the Dijon colored card.  

Flower Patch Photopolymer Stamp Set by Stampin' Up!Flower Fair Framelits Dies by Stampin' Up!

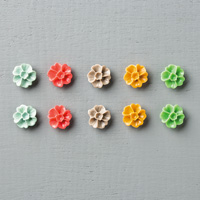
To coordinate with the new in colors, I added some of the new embellishments to a couple of the 3x3 cards above.  I used the Blossom Accents (#138383)

2015-2017 In Color Blossom Accents by Stampin' Up!

Enjoy the new catalog and the new in colors!  See the link to my Stampin Up website to order any of the new items you might need from the new catalog.

Saturday, May 30, 2015

Wishing you Happiness

 
I love the Sahara Sand Lace Trim (#137866) in the Occasions catalog and decided it would be perfect for a wedding card.  I wrapped the ribbon around the card fronts and scrunched it up with the glue dots to hold it in place before using more glue dots to attach the Very Vintage Buttons (#129327).  The colors on the card are Sahara Sand and Very Vanilla.
 
Sahara Sand 7/8 (2.2 cm) Lace Trim  by Stampin' Up!
 
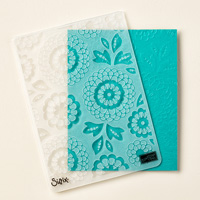
I used the Stampin Distress Tool (#127562) to make the edges of each of the card layers have the torn look.  Also, on the layers, the Very Vanilla in the background and the Sahara Sand on top of that are embossed with the Lovely Lace embossing folder (#133737).
 
Lovely Lace Textured Impressions Embossing Folder by Stampin' Up!
 
The flower that is stamped in Sahara Sand and cut out is from the Everything Eleanor stamp set (#W131987, C124164) and the phrase "Wishing you happiness" is from the Blessed by God stamp set (#W134297, C134300).  I also used the Blessed by God stamp set on the inside of the card to add the inside phrase, along with the flowery cross, which were both stamped in Sahara Sand.
 
Blessed By God Clear-Mount Stamp Set
To add some shine and sparkle to the card, I added another one of my favorite items to it, which is the Vanilla Shimmer Smooch Spritz (#118772).  I sprayed it on the entire card front after using dimensionals and snail adhesive to put it together.  Who doesn't love to get a wedding with a little sparkle and shimmer on it?!
 
Well, if you are wanting to order from the Occasions Catalog or from the current catalog, then now is the time to get your orders in before time runs out!  There's only a couple of days left until the new catalog is available to order from.  Happy stamping!

Wednesday, April 1, 2015

Birthday Shaker Card Fun!


This is the first shaker card I made, and I loved making it!  They are so much fun, and others love to receive them, as well!  You can look up videos if you need specific instructions to watch on attaching the card to it, but I will try to briefly explain below.

-Colors Used:
*Whisper White
*Melon Mambo
*Basic Black
*Bermuda Bay


Here is what you will need to create the shaker effect:  I used the largest size (1 3/4") of the shakers.  I first punched the Bermuda Bay paper with the 1 3/4" circle punch and a 2 1/2" circle from the window sheets and from the new washi sheets.
-Stick shaker frame onto circle washi sheet and stamp birthday own it from Celebrate Today Stamp (OC 137138)
-Attach the window sheet to the back of the bermuda bay card front with the circle hole punched in it
-Put the In Color Sequins (133631) in the shaker frame and stick it to the card front.  Then peel the back of the Washi Sheet (OC 137788) and attach it to the white card.

Shaker FramesBirthday Bash Designer Washi Sheets  by Stampin' Up!

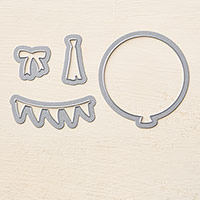
To create the card front I used the 1 3/4" circle punch with the washi sheets and then used the balloon framelit (Balloon Framelits Dies-OC 137362) to cut around it to create the balloon with a hole in it.  You will then attach this washi sheet balloon around the window sheet.

Balloon Framelits Dies by Stampin' Up!

Finally, stamp and cut out the balloons and add the whisper white baker's twine for the balloon strings at the bottom.  

Celebrate Today Photopolymer Stamp Set by Stampin' Up!

Thursday, February 26, 2015

For a Sweet Baby


Well, I needed a baby card, so I decided to look at the beautiful baby DSP papers that I had.  There are many different DSP's to choose from to go with many types of cards or scrapbook pages that you would need.

I created this baby card using the Lullaby DSP (#133695), Whisper White cardstock, and Pistachio Pudding cardstock.
Lullaby Designer Series Paper by Stampin' Up!
I wanted to emphasize on the hearts on the DSP, so I used the Happy Hearts Textured Embossing Folder (from the Occasions Catalog, #137364) and the Hearts Collection Framelits (#125599).   When cutting the hearts, I used them to place in the top corner under the Wooden Elements heart (#132258).


Happy Heart Textured Impressions Embossing Folder by Stampin' Up!                    Wooden Elements Embellishments

I also used the Itty Bitty Banner Stamp Set (W#132022, C#126257) and Bitty Banners Framelits (#129267) to add the small banner on the front.  I used Crisp Canteloupe ink on the Pistachio Pudding paper.  The Crisp Canteloupe ink was also used when stamping Congrats at the top corner using the Simply Wonderful Stamp Set in the Sale-A-Bration Catalog.  

Remember the Sale-A-Bration ends on March 31, so get your free items before it ends!  You have to spend $50 in products in order to receive a free item.  Happy Stamping!


Saturday, February 21, 2015

Spotlighting the Lotus Blossoms


I love the lotus blossoms stamp set in the Sale-a-Bration catalog!  Remember, you just need to put in a $50 order to get a free item from Sale-a-Bration!

For the card, I used Calypso Coral paper and Whisper White on the card front.  I also used these colors to cut out the hearts.  The saying on the white heart is stamped in Calypso Coral, with Rhinestones on the side.  

-Lotus Blossom Stamp Set #139143
-Hearts Collection Framelits #125599

Hearts Collection Framelits Die

-Rhinestones Basic Jewels #119246

When stamping the lotus blossoms, I used Wild Wasabi for the stems.  For the blossoms, I used Calypso Coral, Tempting Turquoise, and Perfect Plum.

  I used the Spotlight Technique to punch out part of the blossom after I had stamped the coral one.
To create the coral heart behind the spotlighted section of the stamp, I traced around the outside of the small heart framelit and cut it out with the Paper Snips (#103579).


Sunday, February 8, 2015

Time for Valentine treats!

Valentine Treat Bag


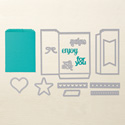
This treat is cut out using the Mini Treat Bag Thinlits Die (#137547), which can be found in the Occasions Catalog.  The great thing about this die is that it comes with several other dies, as well.  The Whisper White heart and the "for you" cut out of Coastal Cabana paper, as seen on the front of the bag, were other dies found in it.
 
 
Mini Treat Bag Thinlits Dies by Stampin' Up!
 
 
I also attached a Tea Lace Paper Doily (#129399) and two hearts (one from Calypso Coral and one from Coastal Cabana) cut out using the Hearts Framelits (#125599).
 
Hearts Collection Framelits Die
 
For embellishments, I used the Pearl Jewels (#119247) and the Itty Bitty Accents Epoxy Stickers (#137856-Occasions) both colored with the Coastal Cabana Blendabilities set (#131000).  The blendabilities are great for adding a little extra color to your embellishments when you need it!
 
To tie it shut, I used the Whisper White Baker's Twine (#124262) and the beautiful new Calypso Coral Pompom Trim (#137898). 
 
Have fun creating these and many other treat bags for Valentine's Day!


Tuesday, January 20, 2015

Celebrate with Starbursts!


 The Starburst stamp set and framelits  are great for many different occasions.  I chose to create a birthday card with the Celebrate! stamp from the Starburst Sayings stamp set.

Starburst Sayings
# W 133182,
# C 133185

-Starburst stamps stamped in the 2014-2016 In-Colors (Blackberry Bliss, Hello Honey, Lost Lagoon) and cut out with the Starburst Framelits #132967

-Rhinestones #119246 add to center of two of starburst stamps and larger starbursts cut out of in-color paper and placed behind stamps

-For the background, I used the honey color, lagoon color, and whisper white on top of it.

-To put the starburst shape on the whisper white paper I took the starburst shapes left in the paper from when I had cut them out previously and used them as stencils.  I sponged over it with the Stamping Sponges #101610 and the In-Color inks.

-Ribbons 3/8" Stitched Satin Blackberry Bliss (#133668) and Lost Lagoon (#133672)

Sunday, January 11, 2015

Sweet Treats

Yesterday I made a quick and simple card for my niece's birthday, and what better to put in a kid's birthday card but candy!  I used the Stampin' Up treat cups to hold a small package of M&M's.


-Pacific Point card base and ink
-Real Red card front 
-Whisper white paper on side of card front
I then used the Sponge Daubers (#133733) to add the dots to go with the candy in the 
Treat Cups (#116802).  The ink for the daubers that I used was Pacific Point, Daffodil Delight, and Tangerine Tango.

Sponge Daubers by Stampin' Up!
Sponge Daubers
Sweet Treat Embellishment Cups
Circle Treat Cups

-1/2" Circle Punch (#119869) was used to punch couple circles in white cardstock
-2 1/2" Circle punch (#120906) used behind treat cup in Daffodil Delight          
-I also added the Brights Candy Dots (#130931).  I love these because you can use them alone or with the brad bases for them.  If you would prefer to use them with the brad bases, then the brad bases are purchased separately.
Brights Candy Dots
Brights Candy Dots
In the bottom right corner I put a birthday stamp, but I guess I got mixed up (Oops, Sorry:)) and used a retired stamp set called Make a Wish.  You could add any of your own birthday stamps, though.  Here are some from the current catalog that would be great to stamp on the card in the Pacific Point ink.

Birthday Surprise Clear Stamp Set by Stampin' Up!
Birthday Surprise stamp set
(C#134120, W#134117)


or


Hey You Clear Stamp Set by Stampin' Up!
Hey You Stamp Set
(C#134519, W#134516)
    
Have a great Monday!

Thursday, January 8, 2015

This and That

My first This and That book is finally finished!  
I did it of a trip we took to the beach with our family.  
If you enjoy scrapbooking, then these are great thing to try out in order to have all of your pictures all in one place.  


The couple little pockets that they come with allow you to keep tickets or other items from your trip to add and as is seen in the bottom picture, I held the braids my girls had gotten in the pocket with some of the washi tape (Retro Fresh Washi Tape #133001).


  You can get washi tape, which is one of my favorite things, and stickers to go with whichever book you choose.  I have the Epic Day themed This and That book.  The rotary stamps are also nice to add a small phrase or date to the pages in the book.  

Epic Day Bundle
Epic Day Bundle #136607

You can also purchase the This and That items in a bundle to save a little.

This and That Remember (MMDDYY) Rotary Stamp
Remember Rotary Stamp #130133


Wednesday, January 7, 2015

Occasions Catalog is Here!

The new Occasions catalog is now available, and there are some fabulous items in it!  
Check out some of the project kits that are in this catalog.  
You can start your year off with a new birthday calendar, or you can add a little spring decoration to your house during this cold winter with the beautiful bouquet kit.


And don't forget about Sale-a-bration!
Order $50 worth of items, and you will get to choose a free item from the Sale-a-bration catalog.

Thursday, January 1, 2015

Tools, Tools

Coming up with a guy's card can sometimes be difficult but this time I have decided to use punch art to create a wrench.  Here is the birthday card I created:


The card base is night of navy and the card front is soft suede.  The edges are distressed and sponged with early espresso.  I also used the Woodgrain Embossing Folder to make it look like wood behind the wrench.  At the bottom of  the card, I added the 1 1/4" Burlap Ribbon (#132140).

Stampin' Distress Tool
#127562
Woodgrain Textured Impressions Embossing Folder
Woodgrain Embossing Folder
#127821


When creating the punch art wrench, I have seen many different ones made, I used the Modern Label Punch with two of the 1 3/8" Circle Punches (#119860) on each end.  On the top circle, I used the Word Window Punch to cut out a section of the wrench and the 1/2" Circle Punch (#119869) to create the hole in the bottom of the wrench, which was all punched out of Basic Gray .  

Modern Label Punch
Modern Label Punch
#119849
                             

Window Word Punch
Word Window Punch
#119857


I also used these two punches to create the tag at the top of the card I stamped "Just for you" from the stamp set called Teeny Tiny Wishes (C #127802, W #128748) in Basic Gray on the soft suede and then punched it with the Modern Label Punch.  I then punched out a Word Window in the Night of Navy and punched the Modern Label around it.  I found out that it was much easier to punch the word window first rather than trying to punch it last out of the modern label.  Happy stamping, and happy new year!